
Were going to go a little out of sequence now, in terms if what has been worked on and the order I write about them.
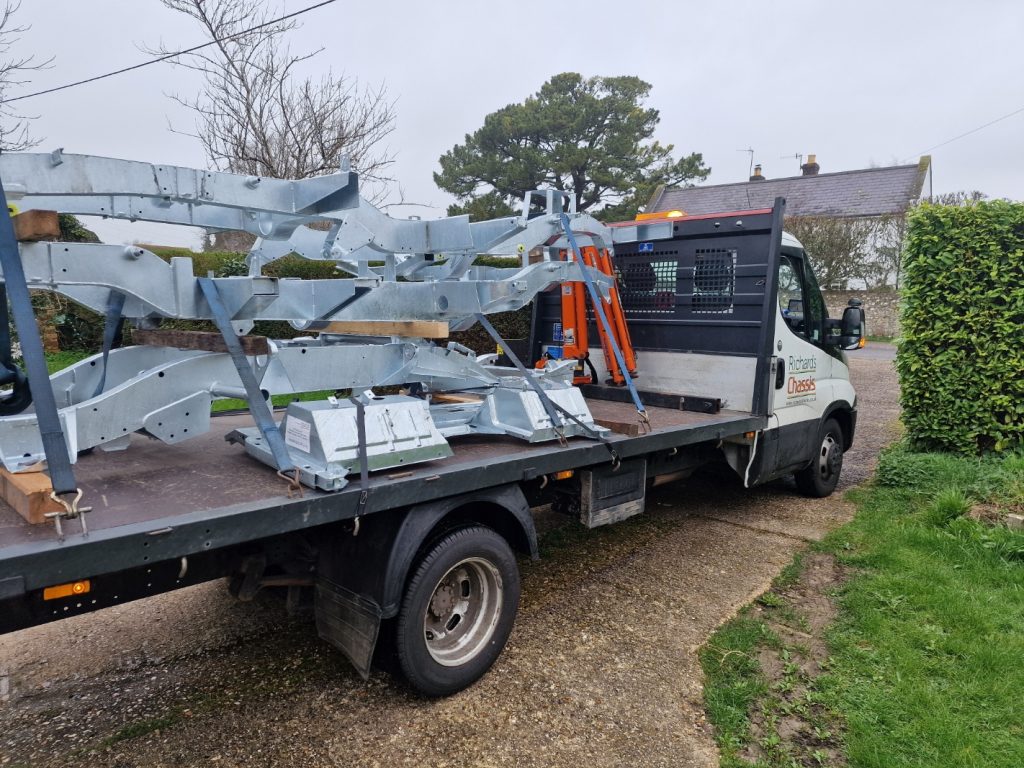
So the re-build properly starts, and it starts with the Chassis that I purchased from Richards Chassis, which was delivered on time and looked great.
Now while I am expecting it to be pretty much perfect, I know from reading that a little bit of work is needed to tidy it up.
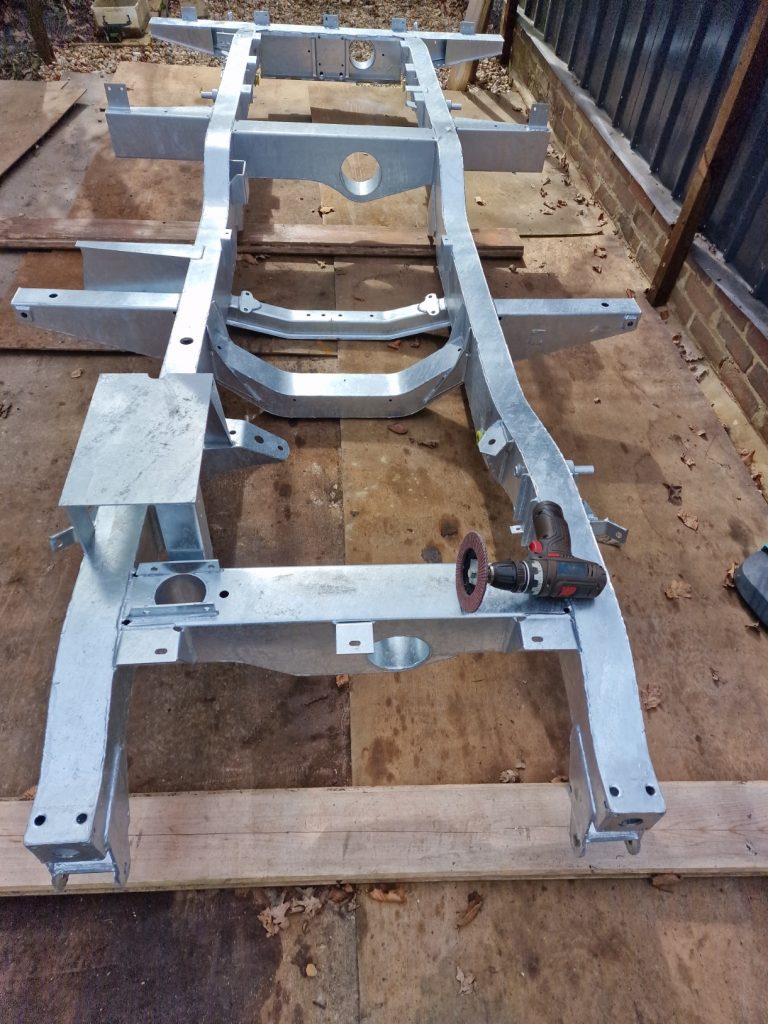
Chassis Preparation
To start with, the Galvanize process can leave little bits sticking out, some rough patches that need some tidying.
My Chassis had a few of these, the biggest one was on the rear cross member, which is perhaps the only part on permanent show.
Some very gentle sanding with a disk, without going all the way through the Galv and have it all nice and smooth.
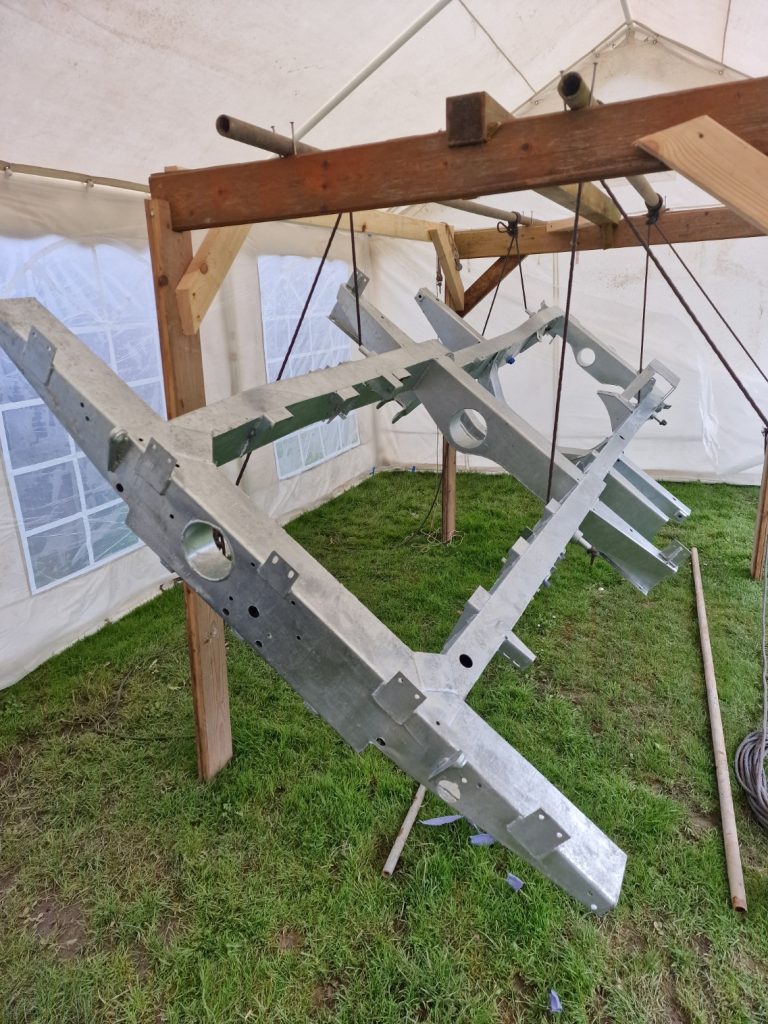
Chassis Painting
Next step was to paint it. I’ve been asked why, when it is protected by Galvanize? The answer is simple, I like the look of them in black and it also provides another layer of protection, want this one to last longer than the one that came off.
First had to find a way to paint it all over, so concocted a frame thingy to hang it from.
A little bit of a bodge, and some handy rope work from Ex-Navy son Daniel and help from the other boys we got it suspended inside a marquee so I could get on with it regardless of the crappy weather we are having.
1st thing was to degrease it, so used FX Degreaser from Buzzweld, who I also got the paint from.
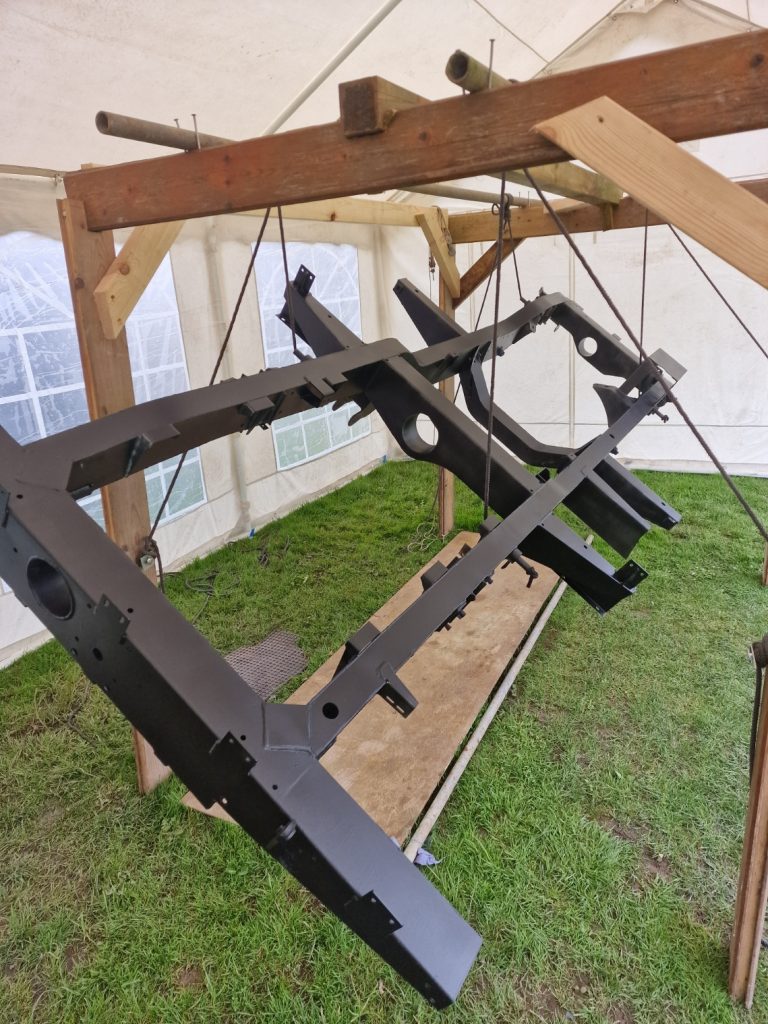
The paint I used was from Buzzweld, called GIO (Glav in One). The normal process, as I understand for painting Galz is a several step process, Degrease, T-Wash, Prime and then paint.
This GIO stuff, is supposed to go straight on, after degteasing. Asked on one of the many forums for other peoples experience, loads came back as gave a thumbs up, so that’s what I used.
I wanted to spray it, which I tried but had mixed success, nothing to do with the paint, more that I probably didn’t thin it properly, it was too cold and/or the gun not setup properly.
Ended up hand painting it, and after several coats was pretty happy with the results.
Didn’t just paint the outside, did the inside aswell.
The original chassis rusted from the inside out probably due to the number of holes and the intended use of a Land Rover, water, mud and in my Land Rovers case, case straw all gets inside the chassis and rots it from the inside out.
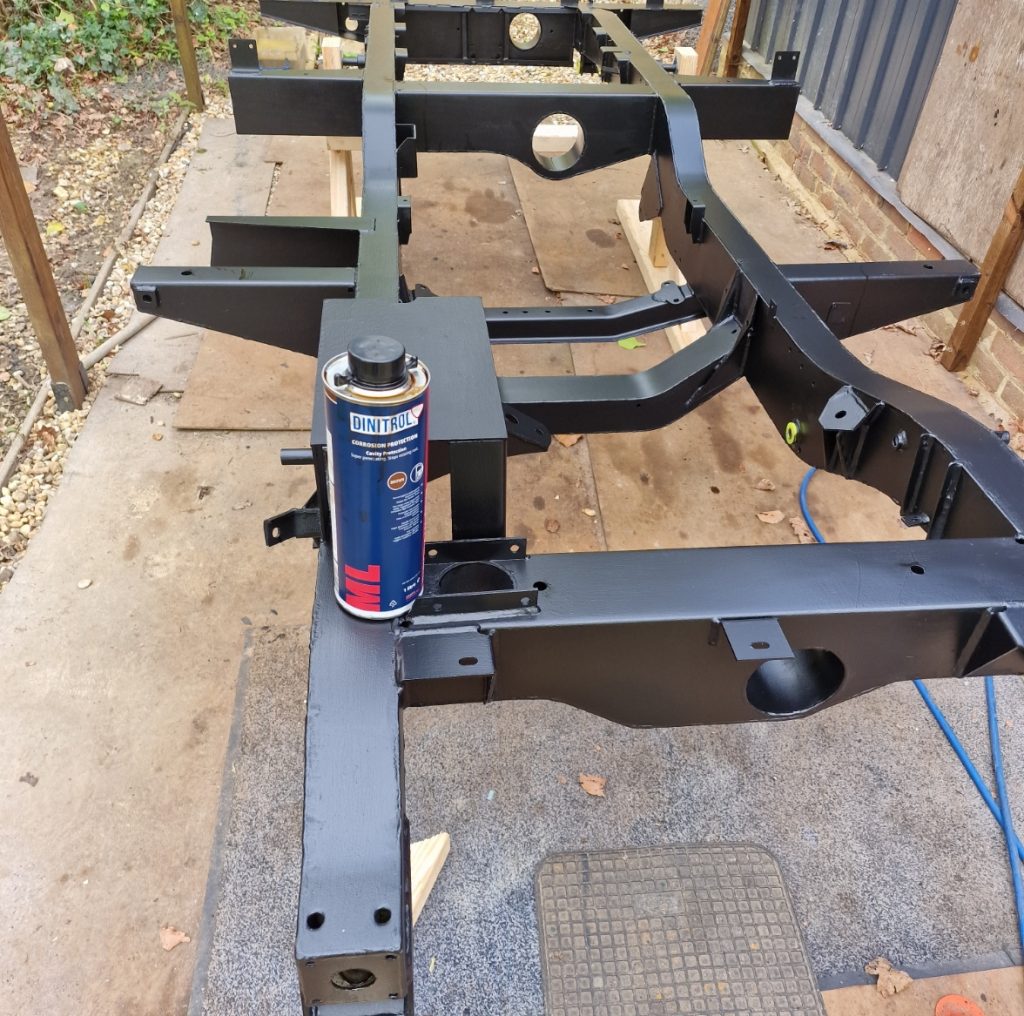
Not Buzzweld this time, but Dinitrol cavity wax. Loads of the stuff injected into the chassis using various methods, each as equally messy as the next, but got loads in and a good sign, loads dripping out onto the floor, but should now be nicely coated.
Chassis Bushes
The final challenge with the chassis was the Bushes, it came supplied with Poly Bushes as opposed to the Metal bushes that are original. Now, that’s not an issue except that I have new rear springs with Metal Bushes and refurbished the front springs with new Metal bushes, and they cant be mixed.
So decision made, poly bushes will come out and replaced with metal ones, not only does that mean I dont need to change the spring bushes and buy loads of extra poly bushes, it is more original, and didn’t like the bright yellow of the ones supplied
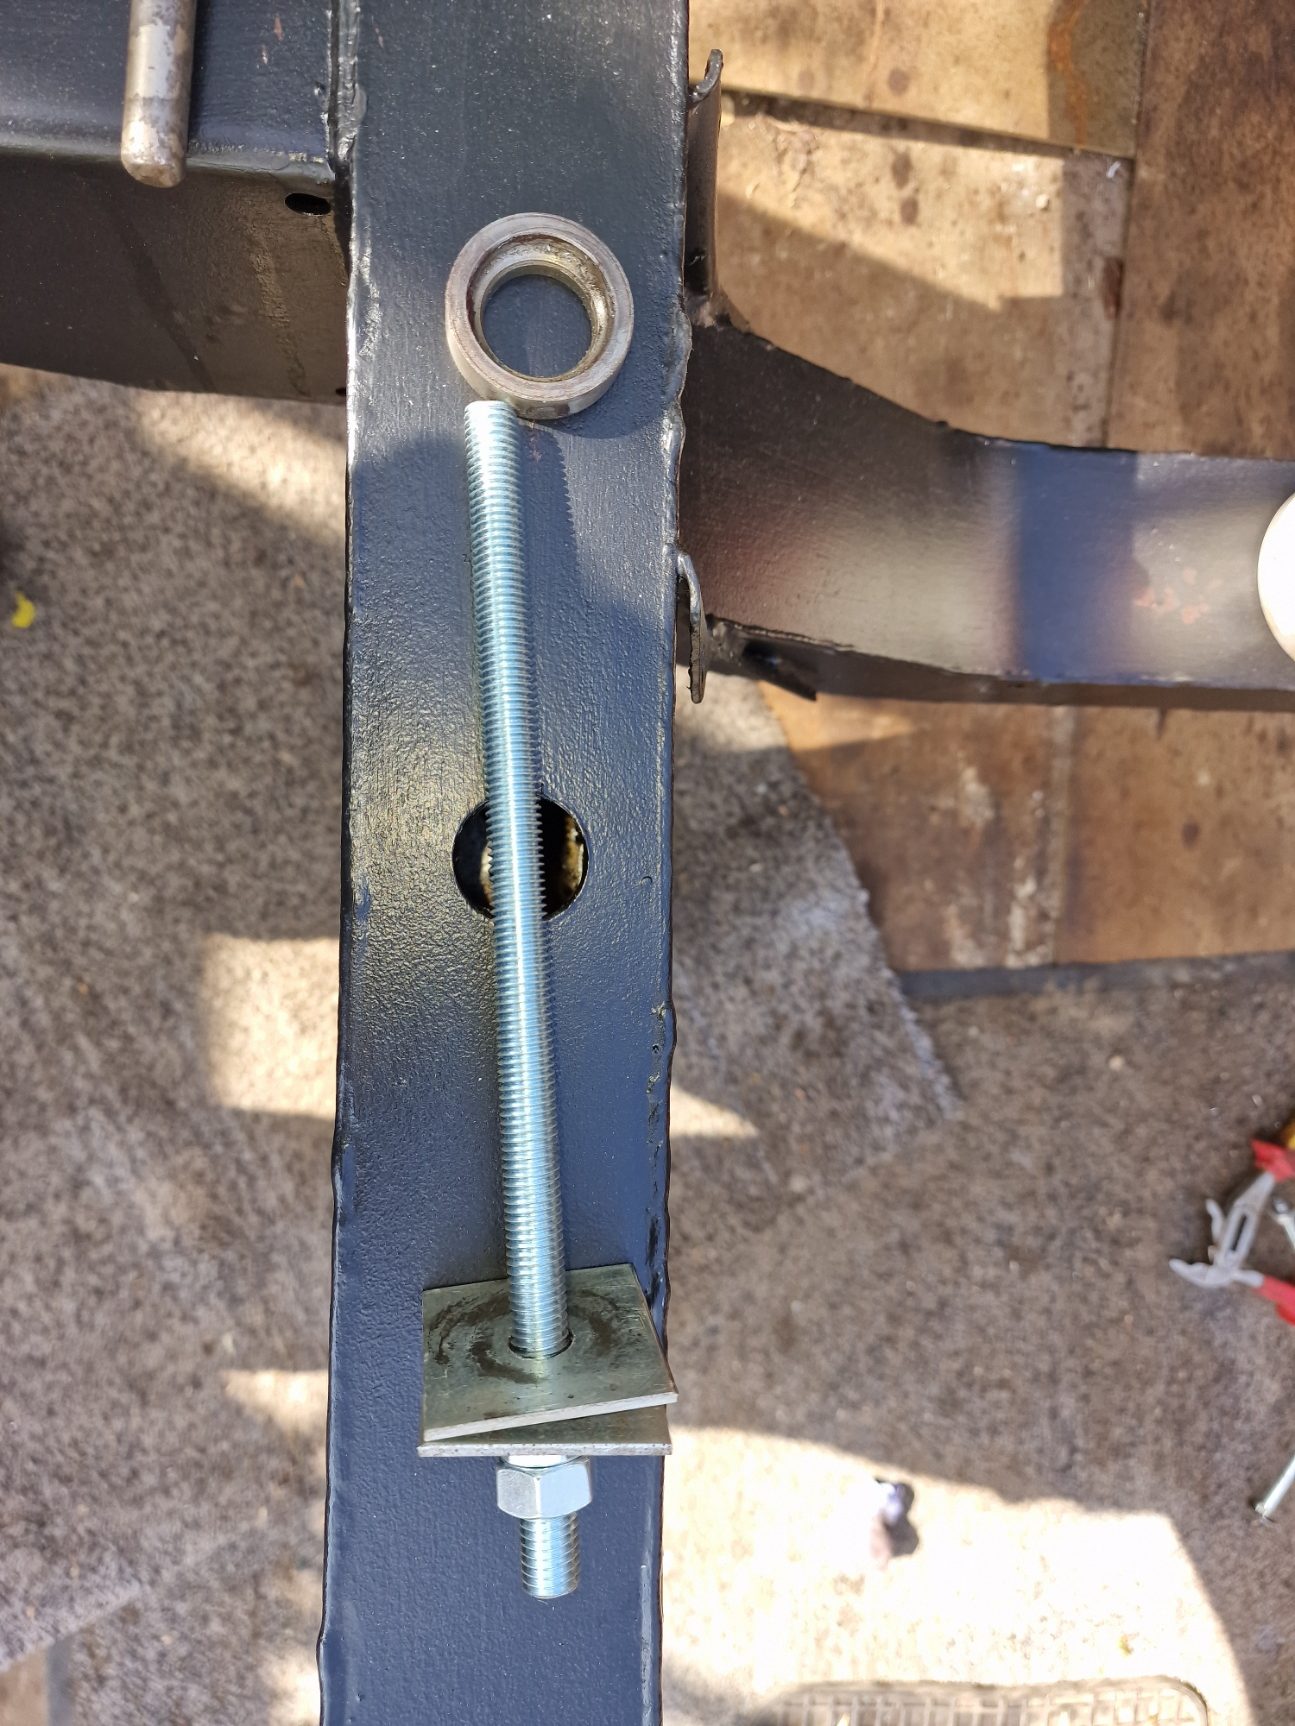
Now, getting the poly bushes out is not a big deal, however getting the metal ones in can be a bit of a challenge as they are a very tight fit and because of the way they work.
There is an outer metal sleeve, with rubber glued in and another metal sleeve on the inside to take the bolts. This inner sleeve is slightly wider that the outer one, can cannot have pressure applied as it will break the bonded rubber.
So, a tool needed, this time instead of spending money, well lots of money anyway, I made one. One of the other parts I have worked on is the steering box which has two bearing races in, which I have replaced, so have two old ones (will show that in a later article), these fitted perfectly over the inner sleeve and sat on the outer sleeve. So with a bit of M12 threaded bar, some nuts and plate washers, made a tool to pull them in.
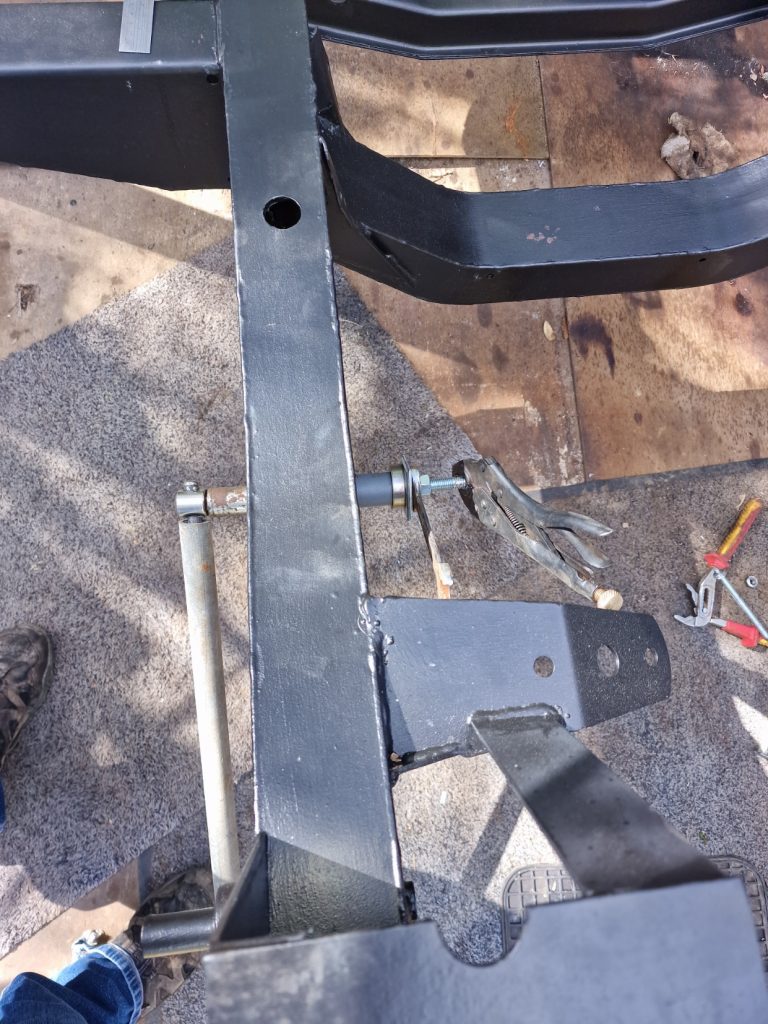
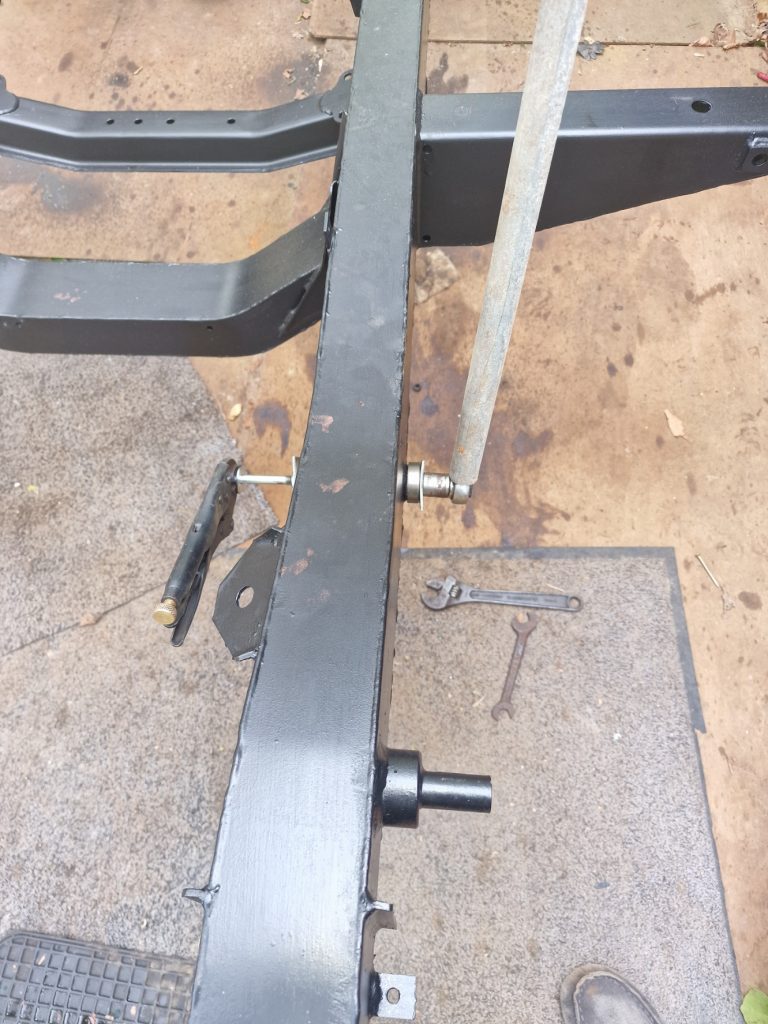
Even with this tool, which worked really well, it took an hour for each of the two front ones, and 30 minutes for each of the the rear two, but they are in after copious amounts of copper grease and a F Off Great big extension bar in the socket, 3 snapped threaded rods and many many knackered nuts later, all sorted.
I probably should have done this before painting, but didn’t realise it was a problem until I tried to fit the rear springs, hey ho, bit of touching up of the paint, I now have a chassis ready to build everything up on.
Leave a Reply