When I started writing this blog, I added a quote, “Plans can change but the goal stays the same” and that has surely proven true.
My original plan was to complete the rear axle, move onto the front and other stuff. As things stand the Axles are still both in bits, albeit with a shelf full of new parts. I have changed the plan a little partly due to circumstance, but mostly procrastination and in-decision on my part. What couldn’t I decide on, well however stupid it sounds, the Nuts and Bolts. Should I clean and zinc plate the ones I have, should I buy new, and if I bough new which ones do I need, BSF, BSW, UNC, UNF? seems I have a selection of all.
So decision finally made, will buy mostly new and re-use some of the more special ones which I will Zinc plate. I purchased a selection of BSF, BSF, UNF, UNC nuts & bolts, in various sizes so I could make sure I knew exactly what I had, and after some time getting a list of all the ones I should have, placed and order with Namrick, an online store with a shop not far from me, in Hove. Waiting on those to arrive.
| Item | Quantity | Item | Quantity |
|---|---|---|---|
| 1/4″ BSF x 1″ H.T. Bolt BZP | 2 | 3/8″ UNF ‘P’ Type Nyloc Nut – Pack of 10..BZP | 1 |
| 3/8″ BSF x 1-1/4″ H.T. Bolt BZP | 10 | 1/4″ UNF Full Nut – Pack of 10..BZP | 2 |
| 3/8″ BSF x 1-1/2″ H.T. Bolt BZP | 10 | 5/16″ UNF ‘P’ Type Nyloc Nut – Pack of 10..BZP | 5 |
| 1/4″ UNF x 1″ H.T. Bolt BZP | 10 | 5/16″ UNF Full Nut – Pack of 10..BZP | 2 |
| 5/16″ UNF x 1-1/2″ H.T. Bolt BZP | 20 | 3/8″ UNF Full Nut – Pack of 10..BZP | 1 |
| 5/16″ UNF x 3-1/4″ H.T. Bolt BZP | 10 | 7/16″ UNF Full Nut – Pack of 10..BZP | 1 |
| 3/8″ UNF x 4″ H.T. Bolt BZP | 2 | 7/16″ UNF ‘P’ Type Nyloc Nut – Pack of 10..BZP | 1 |
| 5/16″ UNF x 3-1/2″ H.T. Bolt BZP | 2 | 1/4″ UNF ‘P’ Type Nyloc Nut – Pack of 10..BZP | 1 |
| 7/16″ UNF x 2-1/4″ H.T. Bolt BZP | 2 | 1/4″ BSF x 3/8″ H.T. Hex Set BZP | 10 |
| 5/16″ BSF Nyloc Nut BZP | 10 | 3/8″ BSF x 1″ H.T. Hex Set BZP | 24 |
| 1/4″ BSF Nyloc Nut BZP | 10 | 1/4″ UNF x 5/8″ H.T. Set Screw BZP | 10 |
| 1/4″ BSF Half Nut BZP | 2 | 3/8″ UNF x 3/4″ H.T. Set Screw BZP | 10 |
| 3/8″ BSF Full Nut BZP | 23 | Mixed Imperial Spring Washers Rect Sect. BZP | 1 |
| Mixed Imperial Plain Washers ‘T’3 Hvy BZP | 2 |
While waiting for the nuts, bolts, washers to arrive I have decided to revise the plan.
I am now going to prepare everything I need to build a completely re-furbished running chassis, including Axles, Suspension and Steering. So, I started looking at some other bits to start working on. Starting with the Front Axles.
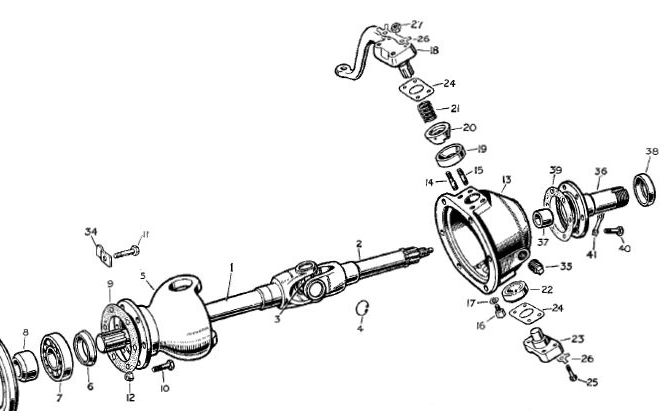
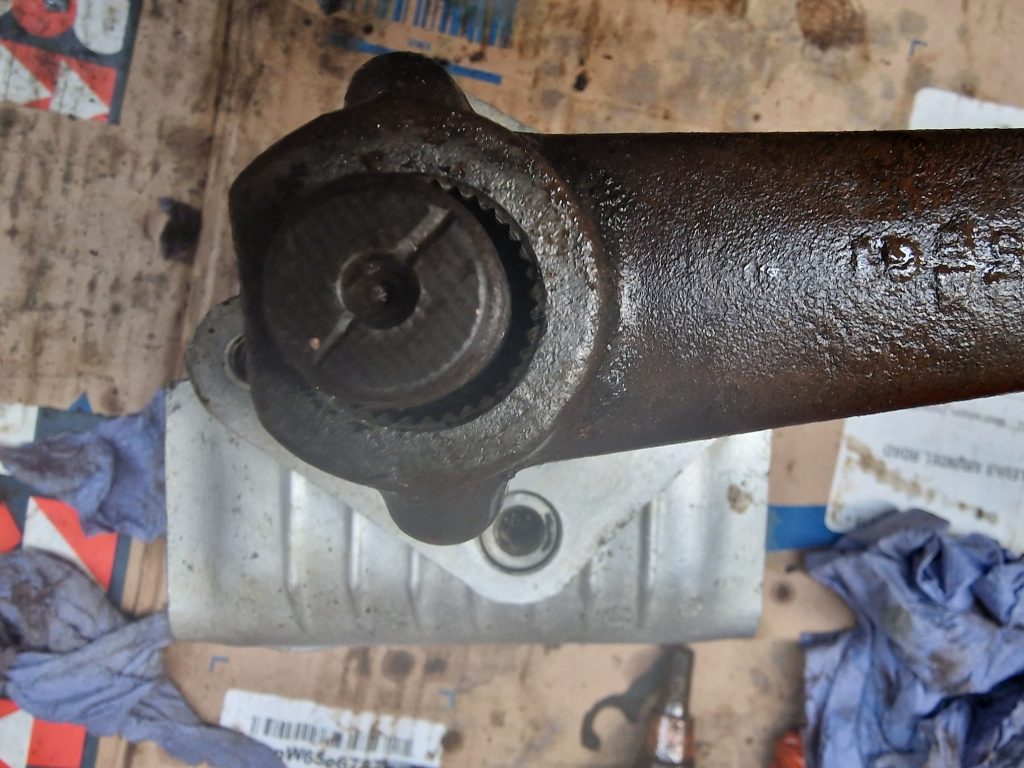
Now, the Front axles have a universal join that sits inside the swivel’s. These shafts also have a bearing inner race and a bearing retaining collar, which also acts as an Oil seal.
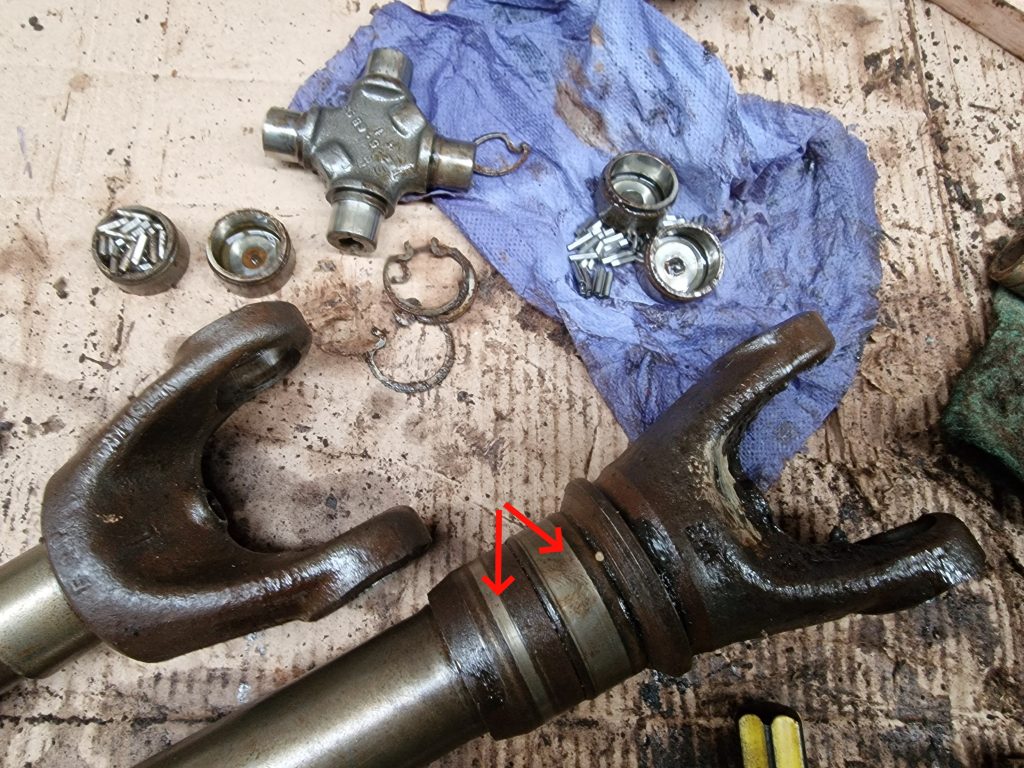
First thing is to take out the UJ, to separate the shafts. Pretty straight forward.
Now I am pleased I bought new bearings and collars for this, looking at them they dont look in the best condition (red arrows).
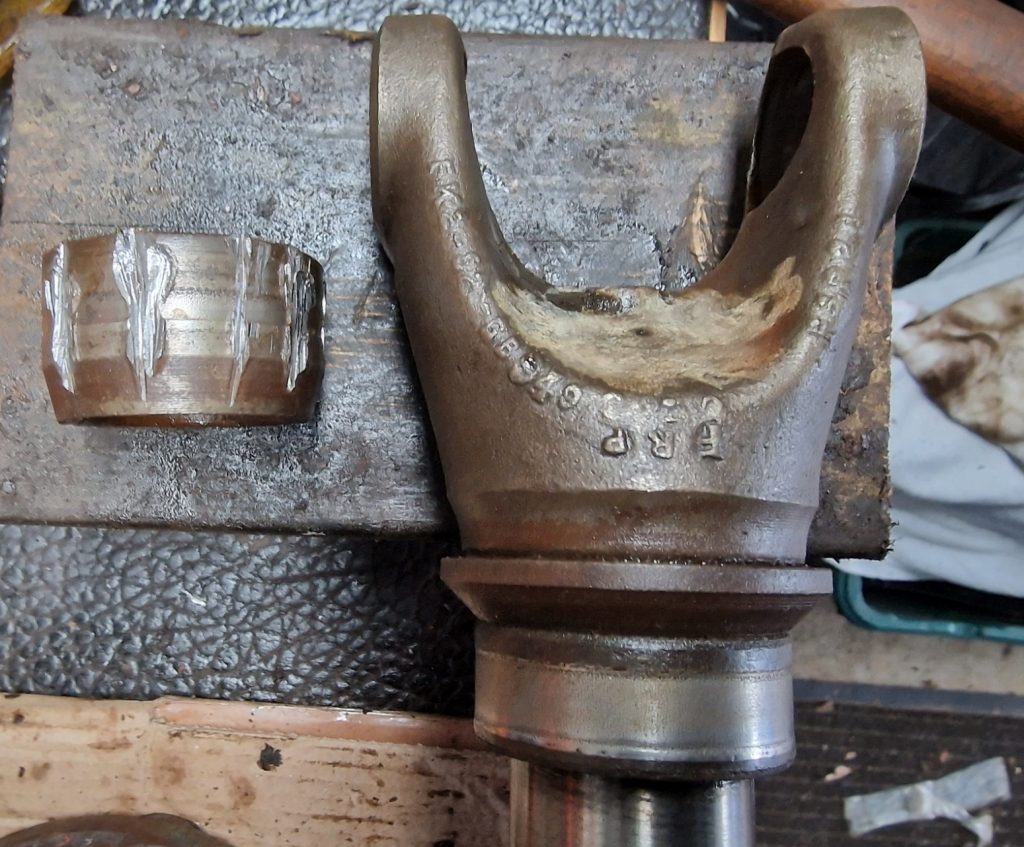
First off, the retaining collar. I have done this before on the front and rear stub axles. It means splitting it with a cold chisel around the outside until it starts to move.
Being carful not to mark the shaft.
Next, the bearing inner race. This I found was a little harder, literarily harder, the cold chisel didn’t even make a mark. Didn’t get a picture of this part but basically it meant taking an angle grinder to it, both weakening it and heating it at the same time. Little nervously, finally got them both off.
That’s all I did with the axles, they are now ready to be re-assembled.
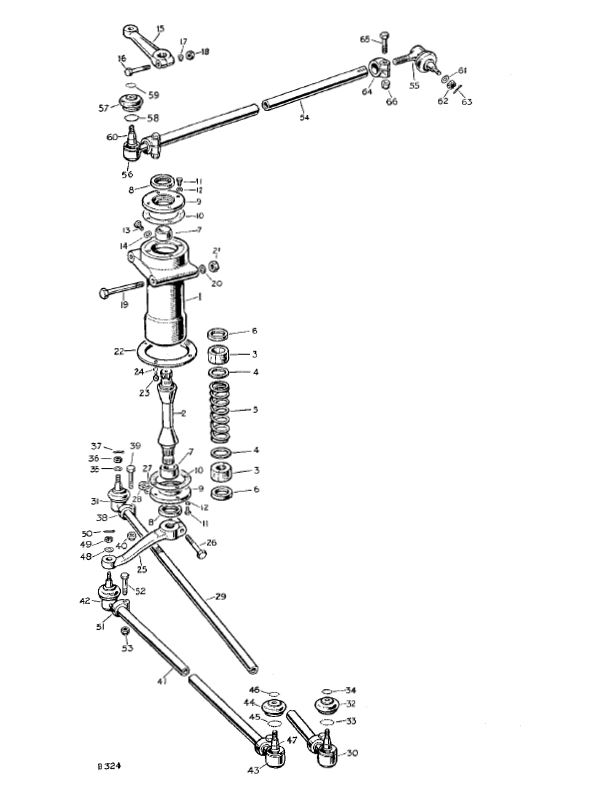
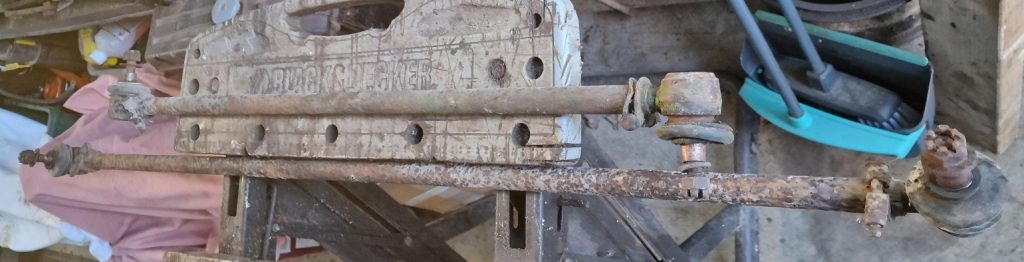
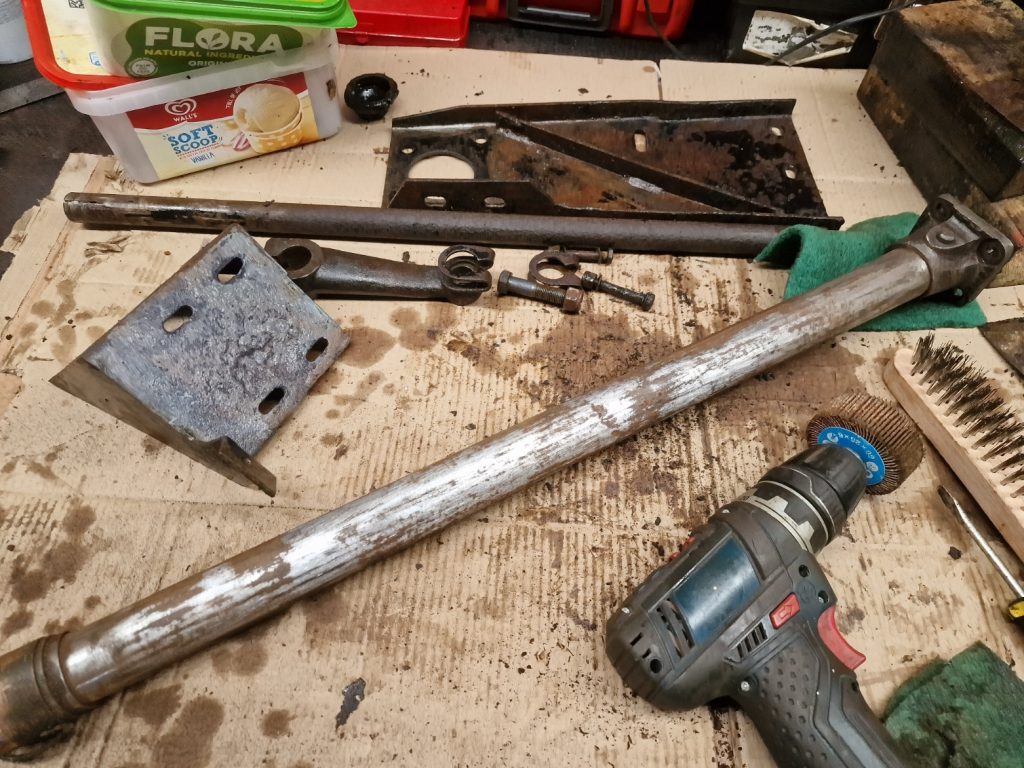
Next part then, the steering arms. There are three of them, one from the steering box to the steering relay, one from the relay to a wheel, and one between both wheels.
Better with pictures I think! Oh, now I’ve added it maybe not.
The three bars have Ball joints, one at each end, one with a right hand thread, one with a left hand thread and they are secured with little clamps around the bar.
Now, all the ball joints came out except 2. After 3 weeks of feeding the threads with WD40, other releasing agents, applying heat, using a hammer they finally came out, after loads of grief and a broken ring spanner I was using as a lever.
But they are out, the bars are cleaned up with a nice fresh coat of paint, ready for re-assembly. Haven’t taken a picture of the painted versions yet, but trust me they are shiny black.
Next job, onto the steering box and steering relay box. The relay box I have already talked about, the steering box will be easy. OMG, made that mistake again, its never easy, especially if you think it will be.
The steering box has what’s called a drop arm on it, and after many attempts to get it off, a quick google search realised that a special tool is needed, and even then it may not come off. Now at £90 for some online, I was not going to pay that for something that might not actually do the job. So, eBay, £30, and I get the tool, and 2 minutes later off came the arm. Anyone want to buy a drop arm removal tool? will likely never use it again.
Cleaned up the steering box, degreased all the metal work, flappy wheeled the bits too big the blast cabinet, sand blasted the rest and got a coat of oxide and black paint on.
So that’s the steering column and steering box pretty much ready to be re-built.
Final part to get everything ready for the re-build is the suspension. Now, the rear leaf springs were horrible, broken springs, really rusty so they will be replaced. the front ones however didn’t look too bad, apart from the little nick from the angle grinder when I took them off, so decided to have a go a re-furbishing them.
So took them apart, spent ages cleaning them up, removing the bushes, a coat of rust converter and a coat of oxide on, ready to be re-assembled. Now I will use these to start but will likely replace them before Isobel is actually on the road.
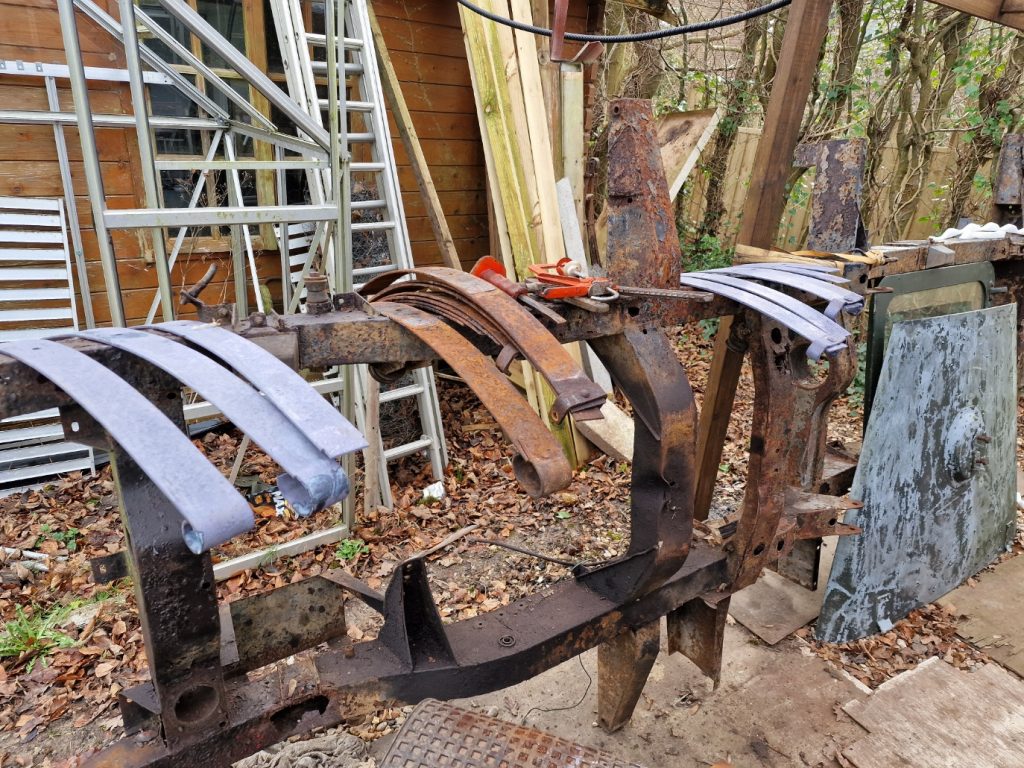
So I have ended up with a load of partially re-furbished, partly finished bits, trust me, its part of the newly revised plan. Now that last picture shows the leaf springs resting on the Old Chassis, which as it turns out is the original.
This brings me to the final part of this article (its been a long one) and the plan. What I have done is spend a small shed load of money on another, well a few new parts orders, along with the biggest purchase to-date, a Brand Spanking New Galvanised Chassis from Richards, which should be arriving in 4 weeks or so, and because I could show I had cut off the original dumb iron, with the VIN number on, and I have the V5, they will stamp the new chassis with the same VIN. That’s cool.
The other orders are for parts to re-furbish all the bits I have been working on and replace some parts (rear leaf springs) that are too far gone. I went to my preferred supplier first, Paddock Spares, and for a few bits they didn’t seem to have, John Craddock Spares.
So this is what I purchased from Craddock Spares
| Item | Quantity | Item | Quantity |
|---|---|---|---|
| Dowel for 9 Leaf Front Spring. (243131) | 2 | JC3 Lock Washer – for U Bolts 1952-64. (234734) | 4 |
| Spring and Shackle Bush Series Vehicles (548205) | 4 | JC3 Plate for Check Strap. (219574) | 4 |
And from Paddock Spare, a little bit more.
| Item | Quantity | Item | Quantity |
|---|---|---|---|
| Steering Arms | U Bolt (Front Axle) (562641) | 1 | |
| Ball Joint Assembly (R.H. Thread) (608464) | 3 | U Bolt (Front Axle) (562637) | 3 |
| Ball Joint Assembly (L.H. Thread) (320902) | 3 | U Bolt (Rear Axle) (242127) | 4 |
| Steering Relay Box | Check Strap for L.H. (237100) | 1 | |
| Oil Seal for shaft (213340) | 2 | Check Strap for R.H. (274469) | 1 |
| Joint washer for retainer (90624436) | 2 | Rubber Buffer for Axles (241380) | 4 |
| Steering Box | Rear Spring (Off Side) (517588G) | 1 | |
| Steering Box Service Kit (DA1236) | 1 | Rear Spring (Near Side) (517589G) | 1 |
| Suspension | Shock Absorber Front (RTC4230) | 2 | |
| Shackle Plate Tapped (537687) | 1 | Shock Absorber Rear (RTC4232) | 2 |
| Shackle Plate Plain (270520) | 1 | Shock absorber top bolt and nut (NRC7064) | 4 |
| Shackle Pin Front end of Front Spring (537741) | 2 | Washer (243022) | 4 |
| Shackle Pin Rear end of Front Spring (537742) | 4 | Split Pin (4063) | 4 |
| Shackle Pin Rear end of Rear Spring (537740) | 4 | Plain Washer (264024) | 10 |
| Shackle Pin Front end of Rear Spring (537741) | 2 | Bottom Plate for Rear Spring (LH) (NRC3898) | 1 |
Now with that on order I should have everything I need to re-build everything to give me a running chassis, with Axles, Steering and Suspension. As I re-build bits, they will go straight onto the new chassis, after the chassis has been painted.
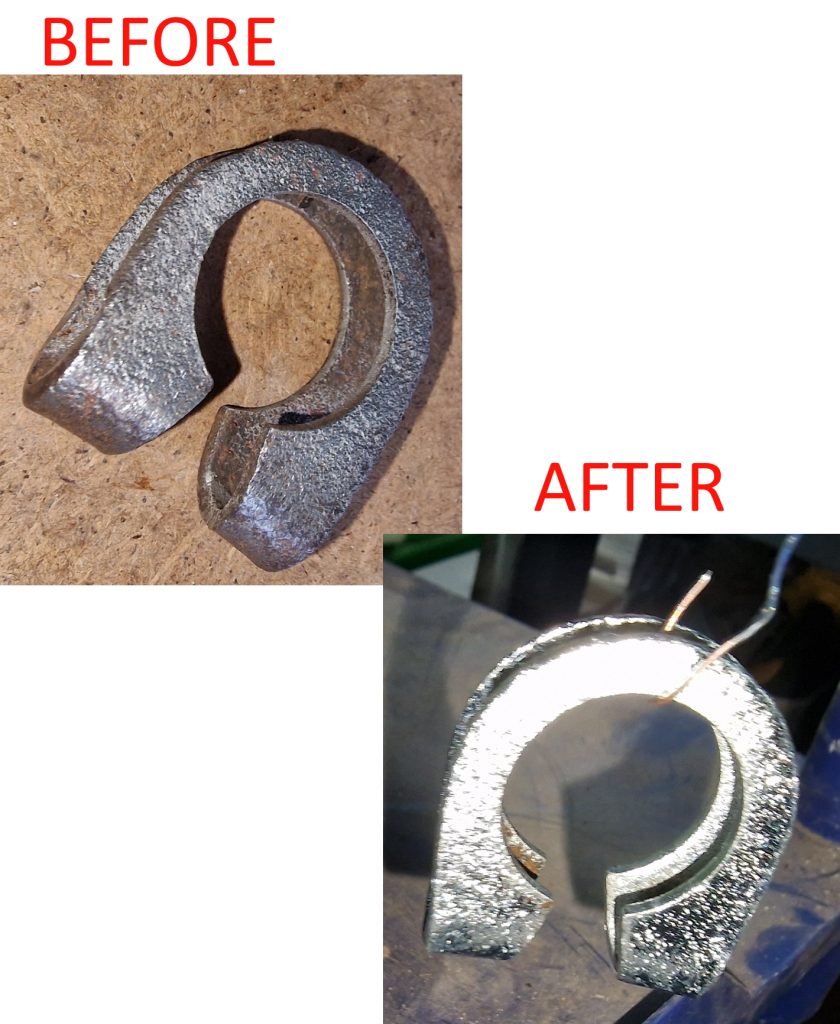
To finish off, I mentioned before I had bought a Zinc Plating kit, originally for nuts and bolts, but as mentioned I have ordered new. However, there are many other bits that would look good Zinc Plated. So with the weather being crap, and waiting on all the new stuff to arrive I had a go.
The picture on the left, shows one of the steering arm clamps after I cleaned it, and on the right, after my first attempt at plating. Not perfect, but actually pretty good.
This is the Zinc plating setup. I purchased a 5L kit from Gateros Plating and some extra bits form Amazon, 10L tubs, fish tank heaters (Solutions need to be around 20oC to work) and 25L of distilled water, need some more of that already (my maths let me down a little).
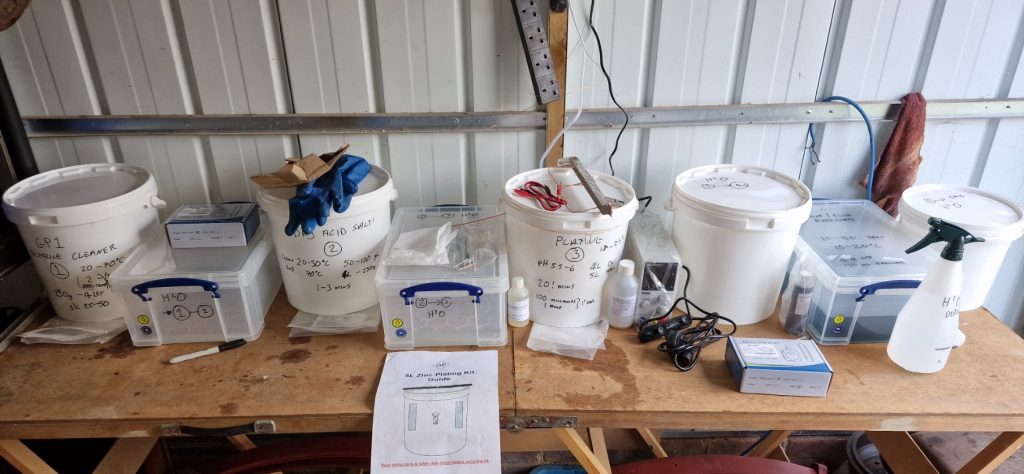
While pleased with the first result, some lessons learned. Wait till the weather is warmer, took ages to get the solutions upto temperature, should have bought a 10L kit, and should have bought 4 fish tank heaters instead of 3. Oh, and the final thing, as everyone says, make sure the parts to be plated are super clean.
That I guess brings this article to a conclusion. Lots been going on, but now need to wait for all the parts to be delivered, along with the new chassis and ideally some warmer weather so I can spray the chassis and give all the painted parts another coat of paint.

As always, thanks for reading, sorry this one was a long one. Will be a while until the next, which according to the revised plan should be a good one. Till then, bye for now.
One Comment
URL Removed
I’ve learn some just right stuff here. Definitely value
bookmarking for revisiting. I surprise hoow sso much effort you put to create the sort of
great informative website. //URL Removed//